 Lynden Siding
 If you're framing a new home or an addition out toward Maple Falls, the windows you choose and how they go in will decide whether that structure stays dry and efficient for the next thirty years or starts fighting moisture problems before the paint even cures. New-construction windows are installed differently than replacement windows, and in a part of Whatcom County that sees long stretches of driving rain, heavy moss growth on shaded rooflines, and marine-influenced air moving in off the Salish Sea through the valley, the installation details matter more here than they do in drier parts of the state.
This page covers what Maple Falls homes specifically need from a new-construction window install, what a correct job actually involves step by step, and why working with a crew that's already done this work in the Lynden area — not a company driving in from out of county for a one-off job — makes a real difference in how that window performs ten winters from now.
What Maple Falls' Climate Asks of a New-Construction Window
Maple Falls sits in the foothill country east of Lynden, closer to the Mt. Baker corridor, which means more tree cover, more shade on north-facing walls, and a longer stretch of the year where surfaces just don't fully dry out. Combine that with the marine air and rain systems that move through this part of Whatcom County most of the year, and you get three conditions that directly affect a new-construction window opening:
- Extended wet season: Rough openings can sit exposed to weather for days or weeks during a build. If the opening isn't sequenced and protected correctly, framing lumber absorbs moisture before the window is even set.
- Moss and organic buildup: Shaded, damp walls grow moss and algae faster here than in open, sunnier lots. Window trim, sills, and the water-resistive barrier (WRB) around the opening need details that shed water instead of holding it against wood.
- Driving rain and wind-driven moisture: Rain in this area rarely falls straight down. Wind pushes it sideways into wall assemblies, which is exactly the condition that flashing and sill pans are designed to defeat — but only if they're installed correctly.
None of this means Maple Falls needs exotic materials. It means the basics — flashing sequence, sill pan drainage, WRB integration, and fastening pattern — have to be done right every single time, because the climate here doesn't forgive shortcuts the way a drier region might.
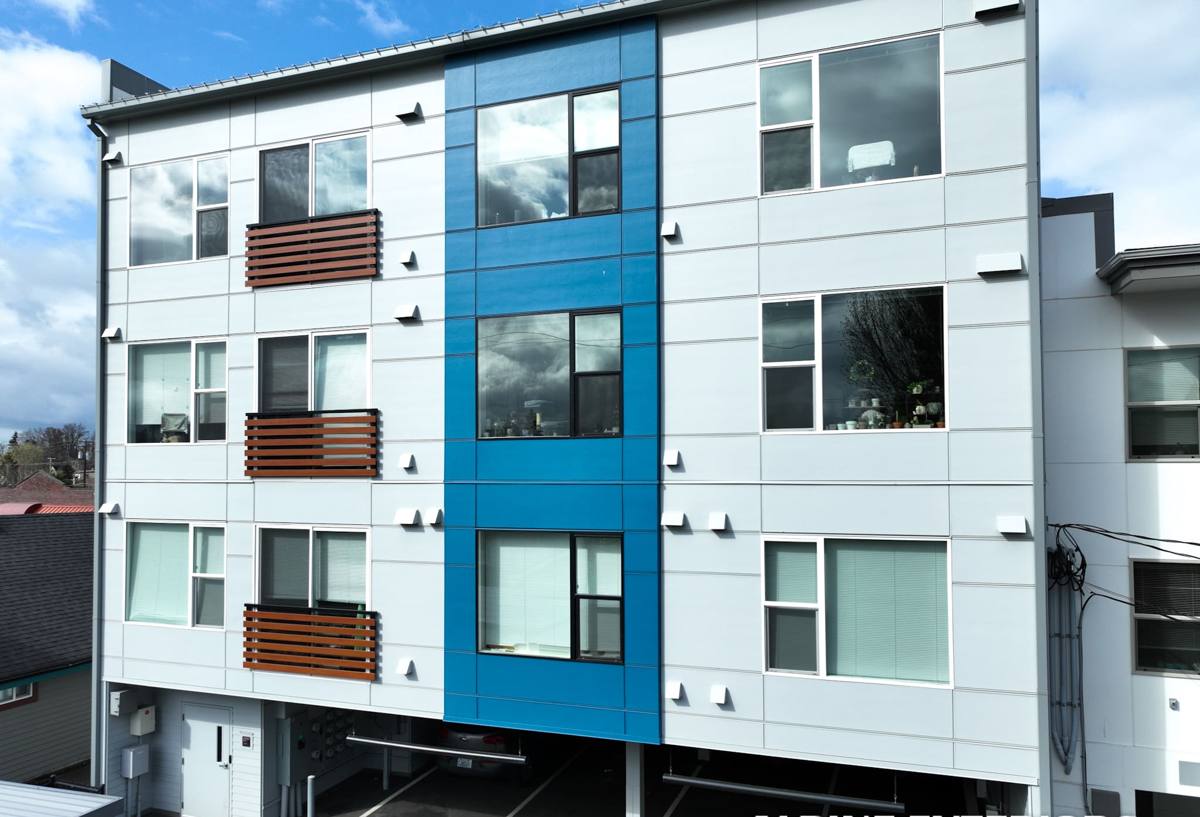
New-Construction Windows vs. Replacement Windows
These two jobs get lumped together in casual conversation, but they're different scopes of work with different tools, different exposure to the framing, and different failure points if done wrong.
| Factor | New-Construction Window | Replacement (Insert) Window |
|---|---|---|
| Installed into | Open, unfinished rough opening with exposed framing | Existing finished opening, old frame often left in place |
| Flashing access | Full access to sheathing and WRB for proper flashing layers | Limited — works around existing trim and siding |
| Nailing fin used | Yes — fin fastens directly to sheathing under the WRB | No — insert relies on the old frame for structure |
| Best fit for | New builds, additions, room-over-garage projects | Older homes where siding stays in place |
| Long-term moisture control | Highest — built into the wall assembly from scratch | Depends heavily on condition of the existing opening |
A new-construction install gives us the chance to build the moisture management system into the wall the right way, from the sheathing out. That's the advantage — and it's also why the sequence matters so much, since there's no old frame to fall back on if a step gets skipped.
What a Correct Installation Actually Involves
The Sill Pan Comes First
Before the window ever sits in the opening, the rough sill needs a sloped, sealed pan that directs any water that gets past the window back out to the exterior — not down into the wall cavity or subfloor. This is the single most common shortcut we see skipped on lower-cost jobs, and it's the one detail that causes the most damage years later when it's missing.
Flashing in the Right Order
Flashing tape and building paper have to overlap like shingles — each layer lapping over the one below it — so water sheds outward at every seam. Side flashing goes on, then the window, then the head flashing laps over the top of the window flange, then the WRB above laps over that. Reverse any of those steps and you've built a funnel instead of a barrier.
Fastening the Nailing Fin
The window's nailing fin gets fastened directly to the sheathing at the spacing the manufacturer specifies — not wherever's convenient. Under-fastening lets the window rack out of square over time; over-fastening or fastening through caulk instead of solid sheathing can crack the fin or compromise the seal.
Insulating the Gap Correctly
The gap between the window frame and the rough opening gets filled with a low-expansion foam or backer rod and sealant made for windows — never standard high-expansion foam, which can bow the frame and cause the sash to bind or fail to seal.
Interior and Exterior Sealing
Once the window is set, plumb, level, and square, both the interior and exterior perimeters get sealed with a compatible sealant, and the WRB integration is finished before siding or trim goes on. This is also the point where we double-check the opening is truly square — a window that's fastened slightly out of square will bind, leak air, and wear its weatherstripping unevenly for the rest of its life.
Choosing Frame Material and Glazing for This Area
There's no single "best" window material — the right choice depends on the wall assembly, the budget, and how much upkeep the homeowner wants to take on. Here's how the common options actually compare for a Whatcom County foothill build like Maple Falls:
| Material | Moisture Behavior | Maintenance | Typical Use Case |
|---|---|---|---|
| Vinyl | Won't rot; expands/contracts with temperature swings | Low — occasional cleaning | Most cost-conscious new builds |
| Fiberglass | Very stable dimensionally, holds paint/finish well | Low | Higher-end builds wanting a painted look |
| Wood-clad | Interior wood needs protection from condensation and humidity | Higher — periodic finish upkeep | Homeowners wanting a wood interior look |
| Aluminum | Conducts cold, prone to condensation in our climate | Low, but performs poorly thermally here | Rarely recommended for this region |
For glazing, we default to a dual-pane, low-E, argon-filled unit as the baseline for this area — it's the right balance of thermal performance and condensation resistance for our winters, without stepping up to triple-pane costs that most Whatcom County builds don't need to justify. Whatever material a homeowner lands on, we install it with the same flashing and sealing discipline described above — the frame material doesn't fix a bad install, and a good install gets more life out of even a mid-range window.
How Our Process Works
- Site visit and rough opening review: We check opening sizes against the window schedule and framing plumb/square before ordering anything.
- Material selection walkthrough: We go over frame material, glazing package, and grille options against the homeowner's budget and the home's exposure.
- Coordination with the build schedule: Windows go in after the WRB is on and before siding starts — we work directly with the general contractor or framer to hit that window in the schedule so openings aren't sitting exposed longer than necessary.
- Sill pan and flashing installation: Done in the lapped sequence described above, using flashing tape and sealants compatible with the specific WRB on the job.
- Setting, squaring, and fastening the window: Shimmed, checked plumb and level, fastened to spec.
- Insulation and interior/exterior sealing: Low-expansion foam or backer rod, then sealant on both faces.
- Final inspection: We check operation (opening, closing, locking) and confirm every flashing lap is correct before siding closes the wall up.
Mistakes We See on Other Jobs — and Why They Matter Here
Most window callbacks we get asked to look at trace back to one of a handful of shortcuts: a missing or flat (non-sloped) sill pan, flashing installed out of sequence, high-expansion foam used around the frame, or a window fastened out of square to save time. In a drier climate, some of these mistakes might not show up for years. In Maple Falls, with the amount of rain and the shaded, slow-drying conditions common on foothill lots, water finds those gaps faster — and once moisture gets into a wall cavity behind siding, it can do real damage before anyone notices from the outside.
This is really the core argument for hiring right the first time rather than treating window installation as a commodity task: a correctly flashed and sealed opening costs the same in materials as a poorly done one. The difference is entirely in the labor discipline and the experience to know where water actually wants to go in this climate.
What Affects the Cost
New-construction window pricing depends on more than just the window unit itself. Here are the main factors that move the number:
| Factor | Why It Matters |
|---|---|
| Window size and quantity | Larger openings and more units mean more material and labor hours |
| Frame material | Vinyl is typically the most budget-friendly; wood-clad and specialty fiberglass run higher |
| Glazing package | Upgraded low-E coatings or gas fills add cost but improve comfort and efficiency |
| Opening complexity | Bay windows, oversized units, or non-standard shapes take more time to flash correctly |
| Site access and timing | Coordinating with a tight build schedule or difficult site access can affect labor time |
We give homeowners and builders straightforward, itemized numbers based on the actual opening count and window specs — not a flat per-window rate that ignores what's actually involved in a given project.
A Pre-Install Checklist for Maple Falls Builds
If you're a homeowner or a general contractor coordinating a build in the Maple Falls area, these are the things worth confirming before window install day:
- Rough openings have been checked for square and correct sizing against the window schedule
- The WRB is installed and lapped correctly before windows arrive on site
- Window units on site match the approved schedule (size, material, glazing, swing/operation type)
- A weather window is planned — ideally not installing during an active driving-rain system
- Sill pan material and flashing tape are compatible with both the window manufacturer and the WRB brand being used
- Someone on site is responsible for confirming each window is sealed and inspected before siding crews close up the wall
Why a Crew Already Working the Lynden Area Is Worth It
Maple Falls and the surrounding Lynden-area foothill lots have their own quirks — tree-shaded walls that dry slowly, longer wet seasons than the open valley floor, and driving rain patterns that come off the same weather systems that move through the rest of Whatcom County. A crew that already works this territory has run into those conditions repeatedly and builds its sequencing and material choices around them by default, instead of relearning it on your project. That familiarity shows up in small decisions — how long an opening sits exposed before it's flashed, which sealants hold up in this humidity, how sill pans are detailed on a shaded wall — that don't show up on a spec sheet but do show up in how the window performs five or ten winters out.
If you're planning a new build or addition in the Maple Falls area and want windows installed by a crew that already knows this ground, reach out for a free, no-pressure estimate. We'll walk the plans or the framed opening with you, talk through material options, and give you a straightforward number — no obligation.